Main Page | Goog News | Many Uses of Googalies | Googalies Home Page | Retailers | Order | Store Listings | Contact Us
|
|
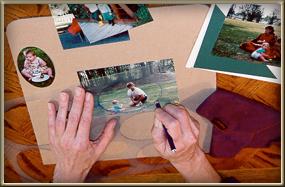 |
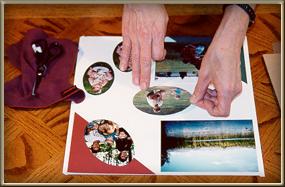
Step
One: Using a grease pencil, trace the desired shape with your
favorite template or stencil. For those new to scrapbooking, templates and stencils are made of translucent plastic sheets that come in a variety of shapes which are used for tracing and cropping photos and acid free mounting paper (see oval template in photo on left). Grease pencils are a must for every scrapper! Unlike ballpoint pens or other permanent writing tools, the lines of a grease pencil are removable from photos and mistakes are easily corrected! |
| TIP:
Before using your grease pencil and GoogaliesÛ, be sure to place your photo on a piece of scrap paper or cardboard
to prevent the residue from getting on your final layout page when wiping the grease
pencil off your photo (see Step 3). Simply use the cardboard backing that often comes with
writing tablets, page refills and sometimes packages of colored paper. TIP: Keep your grease pencil in the freezer until ready to use, especially if you live in a warm area - keeps it firm, uses less pencil line and you don't have to sharpen it so often! When grease pencils get warm, the soft lead tends to break more easily and often puts a thicker pencil line down than is necessary. |
 |
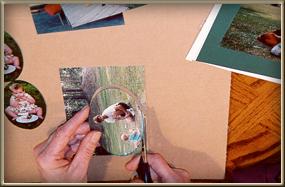 |
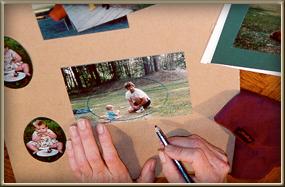
Step 2: Cut
the shape using your favorite scissors - regular straight-edge or decorative, such as
those made by Fiskars or Creative Memories. Decorative scissors can be purchased at any scrapbook store, craft stores and even fabric stores or through your Creative Memories consultant. Cutting a photo, colored paper or a border with these scissors is simple while adding dimension and color to your page. |
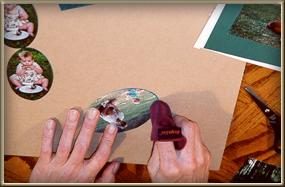
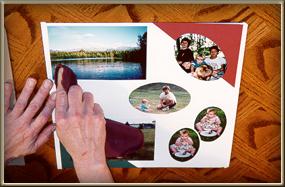
| Step 3: Using your GoogaliesÛ, wipe the grease pencil line from your
photo. I like to use two GoogaliesÛ - one for the blue grease pencil and the other for finishing touches. Note, this is where you will appreciate using a piece of cardboard or scrap paper beneath your photos until you've completed your cropping. As you wipe the edges of the photo, some of the grease pencil residue will be left on the cardboard and when you pick up your photo, you will see the shape of your photo left by the residue. (Important note: a grease pencil and its residue are NOT erasable from your album pages.) |
 |
 |
Step
4: Optional ~ you may wish to mat your photo with acid free
paper ~ then place your photo on your layout page. Complete your layout with stickers, die
cuts and don't forget to do your journaling! I've learned to keep notes with each group of photos as they are processed. Sometimes it may be several months before you are ready to work on those photos and the notes help to rekindle vague or even forgotten memories. |
| Step 5: Once your layout is complete, use your
GoogaliesÛ to wipe away
fingerprints and smudges from each photo on the page! Now that we've gone to the trouble & expense of using only acid free products to protect our photos for future generations, it only makes sense to wipe the oil from our own fingerprints off the photos once the page is complete! |
 |
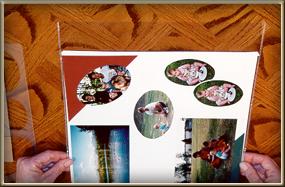 |
Step
6: Put on your page protector and then wipe both sides with your
GoogaliesÛ. A
GoogaliesÛ will remove dust
and fingerprints from your page protector.
|
| Step 7: After completing each scrapping session, wash your GoogaliesÛ and you're ready for the next session. (See Use & Care instructions.) | 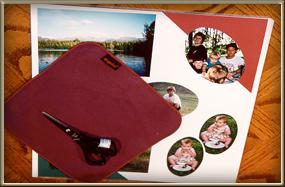 |
|
TIP: If you find that your page protector is slightly grungy (my grandkids often have grubby hands when I catch them looking at my photo albums!), you may lightly dampen a small corner of your GoogaliesÛ and clean it. After cleaning with the damp portion of the cloth, use a dry portion of the cloth to dry the page protector before placing it in your album. It will be as good as new! |
|
TIP: Use your GoogaliesÛ for cleaning your templates (easily wipes off grease pencil residue), border rulers, and scissors. It is recommended that you wash your GoogalieÛ after cleaning accessories to remove any particulate matter that may adhere to the cloth before using it again on your photos. |
|
TIP: GoogaliesÛ will keep your camera and lenses clean! GoogaliesÛ are safe for all fine opticals! Professional photographers find that GoogaliesÛ clean far better and last far longer than the typical packages of lens cleaning cloths. Also, GoogaliesÛ are recommended for cleaning the Mylar film covering on the LED screens of your digital camera. TIP: Keep an extra GoogaliesÛ handy to clean your eyeglasses with while scrapping! Just fog your glasses with your breath and clean - you'll be amazed at how much better you can see!
|
|